6.22.2011

Concrete Pots

We've been seeing great little planters people are making out of concrete and I wanted to make my own. I've seen a number of examples where people used throw away food containers as molds, I wanted to do something similar and came up with an easy way to use inexpensive bowls. They came out with a great look and the molds will be reusable for many pours.


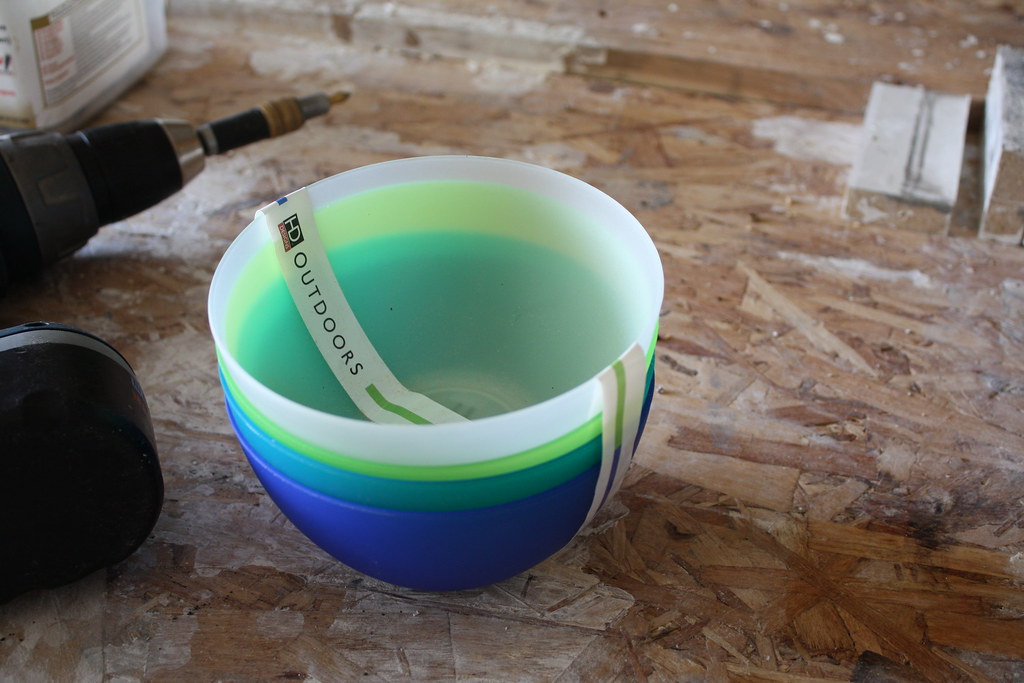
I picked up these bowls at the local grocery store. What made them nice was they had several different sizes and the price was right. I ended up purchasing a couple sets of bigger bowls and a couple sets of smaller bowls. The bigger bowls became the outside shape and the smaller set became the inner mold.


The hardest part was cleanly cutting the bottom off of the larger bowls. There are probably other was to do this but the table saw worked best for me. I raised the blade high and ran the opening of the bowl against the fence and slowly eased the bowl into the blade. I then rotated the bowl until the entire bottom was cut clean off. I then fixed the smaller bowl to a small piece of 3/4" scrap melamine. This was done simply by drilling a hole in the bottom of the bowl and then attaching it to the melamine with a 3" screw.


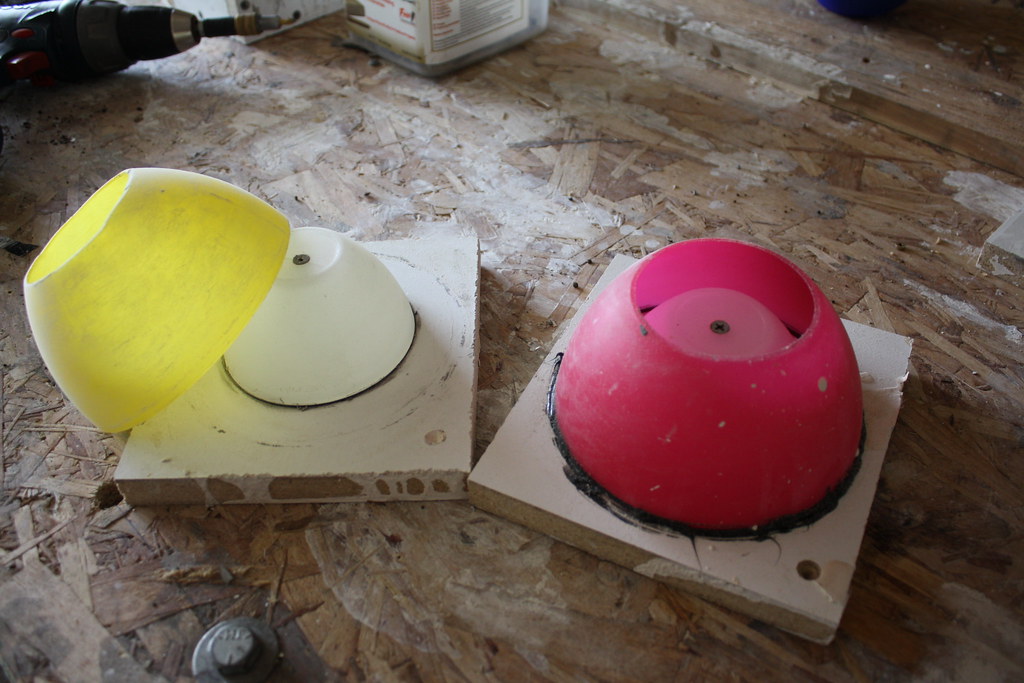
Lastly, I centered up the larger bowl around the smaller inner bowl and glued it down with silicone. Once the silicone set, it was ready for the concrete. The concrete always comes out of the molds easier with a release agent, I find that a decent car wax works really well. I gave the entire interior of the mold a good waxing before the pour. For the pots shown I used my own concrete mix but something like Quikrete 5000 would be plenty good enough for a project like this. Just remember, to much water will make the concrete weaker and more likely to crack. Use as little water as possible but just enough for it to be able to settle down into the mold...this can take a little practice. Another tip is you don't want the concrete to dry out fast, concrete does not dry, it cures and hydration during curing is extremely important for increased strength and minimizing cracks. I typically keep the concrete damp for a few days after the pour.


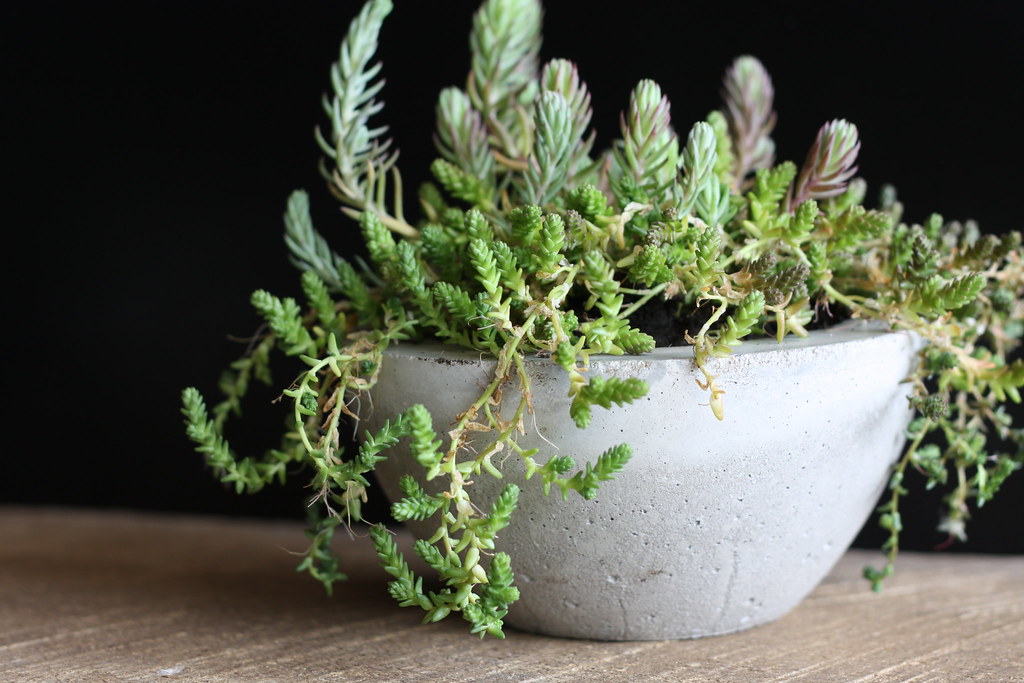
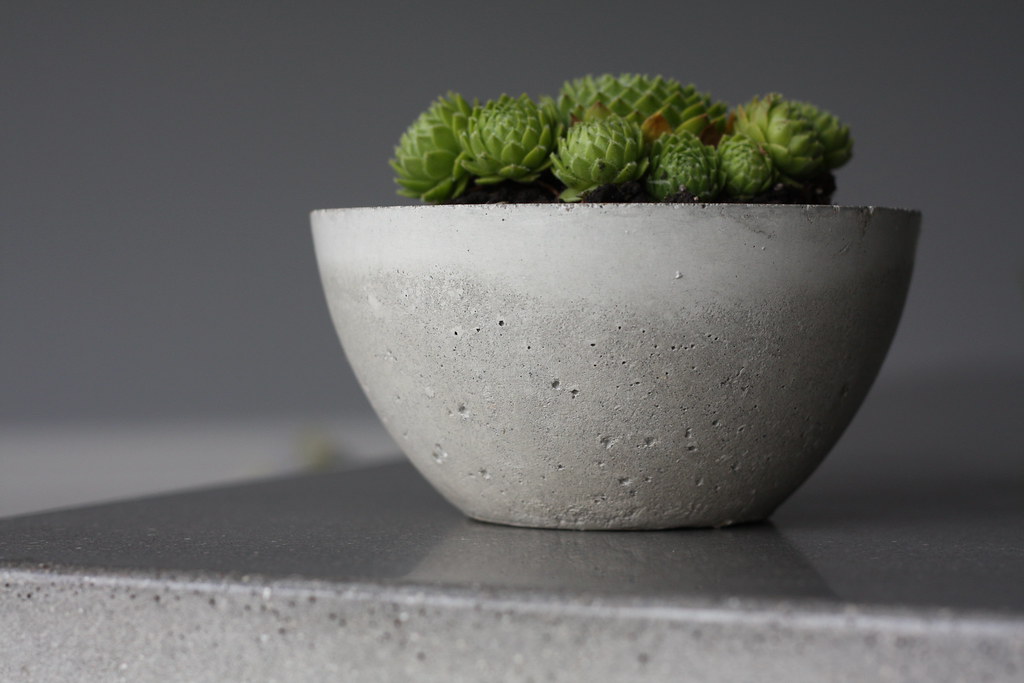
After I finished up the pots, I sealed the interior with a poly acrylic. I wasn't sure if the watering of the plant would make it's way through the pot. If you were going to keep the pots outside or on a surface that can't be damaged then I'm sure you could get away without sealing them. Angie really likes succulents so we picked a couple different kinds and they really looked great.


5.14.2011

Kitchen Cabinets for Entertainment

When we completed our basement, we were in need of an entertainment center. We shopped around and looked at everything out there and we just couldn't find anything we really liked. I also found that the average entertainment center didn't have enough depth for the important part of the the entertainment center, really nice audio components. :) From looking around, we determined that we liked the look of the low profile entertainment centers with wall mounted TVs...so we set out to build one.

We also wanted something contemporary yet rustic. That's when we came up with the idea of using wall cabinets and adding a warm look with wood. To capture the low profile look and the needed depth for the stereo components, we used full depth, 15" refrigerator wall cabinets from Ikea. They had great styling at a budget price. They also had nice complimenting hardware for the feet and pulls. The slow closing hinges were a nice addition as well.


For the wood, we really wanted something rustic with good character. We were able to find some beautiful aged barn wood from a local who salvages barns. The siding was from a local barn that was 150+ years old. We loved the idea of using local history. We liked the character so much that we didn't do any fabricating, we just cut the siding to length and fixed it to the top of the cabinets.


I decided it needed a little more to complete the look so I added a small back splash. Unfortunately, I bought the last 2 pieces of siding so I had to do something a little different. I found some white oak barn flooring that had saw marks from the milling years ago. The back splash complimented the top perfectly.


Something that also helped make the look very clean, we managed to conceal all wiring and  components. When creating an entertainment space, consider wall mounted speakers and spend the extra time to hide your wiring and components. Running in wall speaker wire is not bad with the right tools. You can also store all those stereo components behind closed doors by purchasing an RF capable remote. The RF remotes transmit through most surfaces and it's really nice cutting down the remote collection to a single universal remote.


The overall look ended up costing less then many entertainment centers out there and it is more functional.

Randy

4.28.2011

Take a load off

Spring is finally here! Now that the weather is finally getting nice, it's time to start enjoying some outside time! My father-in-law wanted to add some seating to his newly installed paver patio so we created this great bench together. He is a wood worker so he took on the top while I created the concrete bases.

He crafted the top out of cedar 2x4s. To add to the appearence, he gave the ends of the bench a slight taper. He consealed the hardware with some nice wood plugs and sealed the wood. The bench is really a simple 3 piece design. The wood top slips over the concrete ends and securely rests on them.


I used a high strength charcoal colored concrete mix for the ends. The dark grey color really compliment the tone of the cedar wood. To give the bases more of a gloss finish, I high polished them and finished them off with bee's wax. The high strength concrete will last for years to come.


The design allowed for the concrete to show through the wood top. For this section, I decided to feature an oak leaf. The leaf was imbedded in the mold minutes before I did the pour. The amount of detail in the leaf came out amazing. It was a simple design detail that had a lot of impact. I've done a number of benches now and this one is one of my favorites.

Randy

4.14.2011

Rub a dub dub!

It was time to rid ourselves of the builder grade laundry room so we decide to gut the room and make it our own!


We don't have a "before" picture, but imagine a room filled with cheap linoleum, this utility sink and builder grade appliances...the washer loved to start and stop on it's own!
We are lucky enough to have a family member that works at Bosch who was able to get us a great deal on a new front load washer and dryer.  Surprisingly, the appliances helped shape the design of the room!  We liked the satin gray color and the curvature of the doors.  They were also stackable units that gave us more space for cabinetry and a counter top for folding. We previously just had the wash tub and the side by side appliances.

We replaced the linoleum with a 6x6 porcelain tile from Home Depot.  Then we installed a few "off the shelf" cabinets from Lowe's and added some curved pulls from Home Depot.


Next we needed a counter top. Randy has been working with decorative concrete for a couple years so a concrete counter top was an easy choice. In designing the counter top we thought grey would look nice to tie in with the appliances and it would contrast well with a white subway tile...we've always wanted to use subway tile somewhere! We used a sand mix for the counter in two inch thickness to make it stand out. We also thought it might be fun to allow this top to be more natural looking so we polished it out to only a satin finish and left the air bubbles in the edge unfilled. A penetrating sealer was used and we finished it off with a good coat of wax. It makes for a perfect folding surface! For the sink we went round and stainless (picked up on eBay) to match the round doors on the appliances.


The tall Kohler faucet was also an eBay deal....it didn't work out so well for a car dealership that sold it to us but it worked out great for us. Tall faucets with shallow sinks apparently splash a lot. :) It was actually one of our better finds, we picked it up for $60, it was nearly a $300 faucet.


It all tied together nicely and we even found a nice matching mirror. We finished off the room with a few Ikea touches. It is one of the smaller rooms in our house but it is now one of our favorites. :)


Randy

4.06.2011

Knock knock...

Come on in!  The door is open!

As a start to our blog, we'd like to share a door project with you to welcome you in!


We scored this farmhouse door on Craigslist for $10.  It was from a farmhouse that was more than 100 years old.  We chose this door for it's unique two panel style and thought it would look great mounted horizontally as a headboard in our guest room.  The size of the recessed panels allowed for the door to be trimmed to fit a queen sized bed just right.

We also loved the rustic look of the old keyhole and decided to mount the door with the keyhole at the top to give it more character.


When we first started working on it we thought we would strip it to bare wood and antique it, but soon found layer upon layer of paint.  Once we started removing the layers of paint we discovered color tones that went well with the color scheme we had selected for the room. We revealed pale yellow and brown tones. We liked the look so much that we decided to stop there and begin the final coat. To finish the piece, we used a water based satin semi-gloss polyurethane.  After the finish was complete, we mounted the headboard on the wall with a simple French cleat that we made out of a 1"x4" poplar board.


Randy & Angie


Related Posts Plugin for WordPress, Blogger...